Capturing the Aurora Australis
Tips-tricks Intermediate
A complete guide to photographing the Southern Lights using ShutterTime to find the perfect conditions, location, and timing.

8 min read
Published February 19, 2026
The Aurora Australis (Southern Lights) is one of nature's most breathtaking displays — ribbons of green, pink, and violet light dancing across the night sky. Capturing it on camera requires the right conditions, location, timing, and gear. ShutterTime makes this easier by tracking aurora activity alongside weather, moonlight, and cloud cover so you know exactly when to head out.
This guide walks you through setting up an Aurora photography profile in ShutterTime, choosing the best locations, reading the Aurora forecast tab, and preparing your gear for a successful shoot.
Setting Up Your Aurora Profile
A photography profile in ShutterTime defines the conditions you need for a specific type of shoot. For aurora photography, you want dark skies, minimal cloud cover, low moonlight, and elevated geomagnetic activity (measured by the KP index).
Start from the Community
The fastest way to get started is to install the Aurora profile from the Community section. Head to Community → Profiles and you'll find a ready-made Aurora profile that you can install with one click.
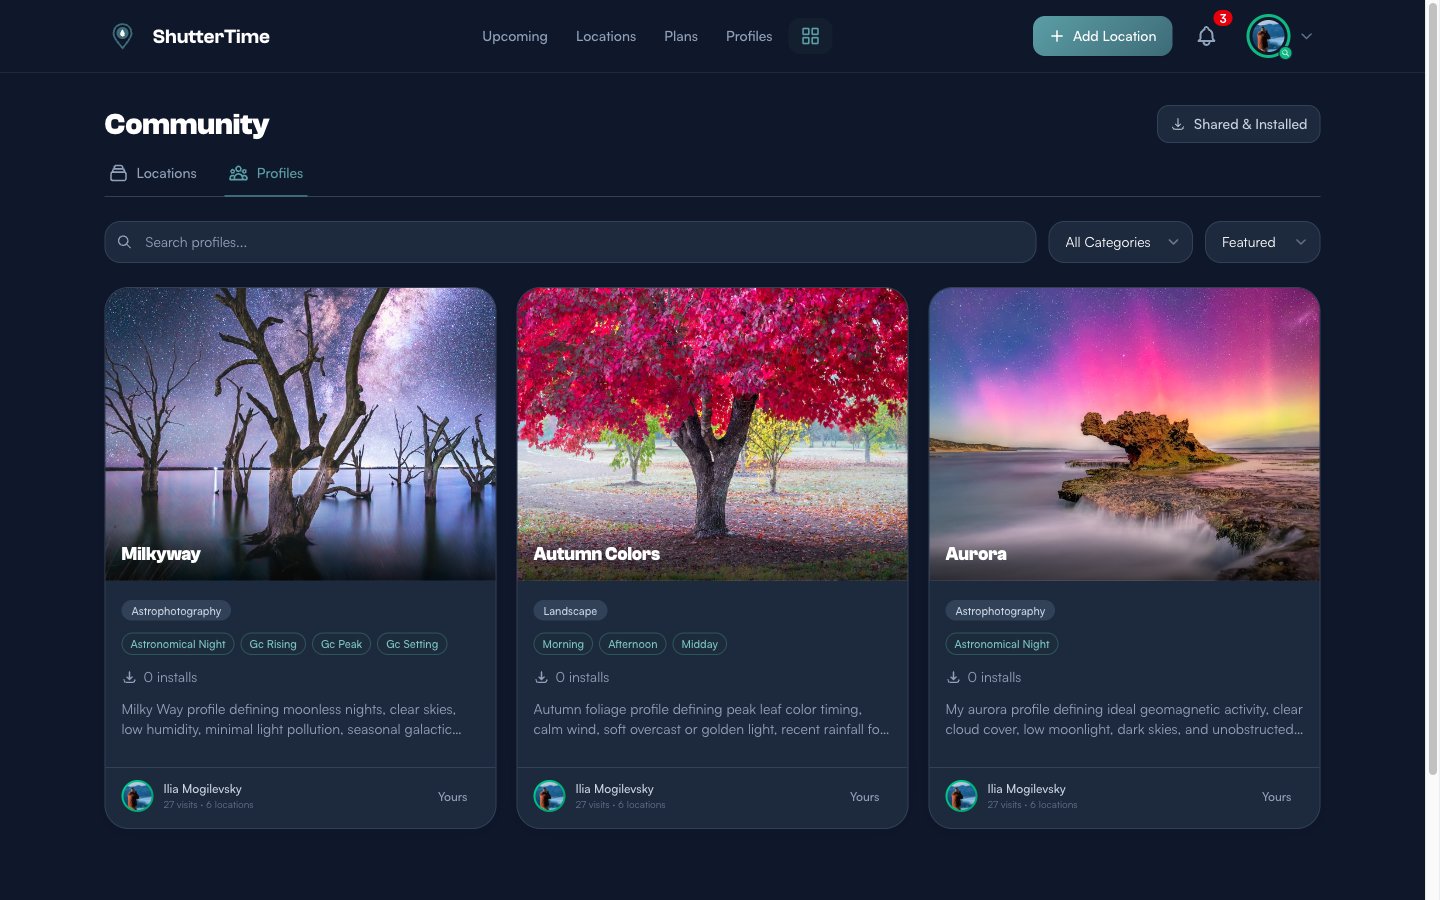
Once installed, the profile appears in your Profiles page and can be assigned to any location.
Profile Configuration
If you want to create your own or customise the community profile, here's what matters:
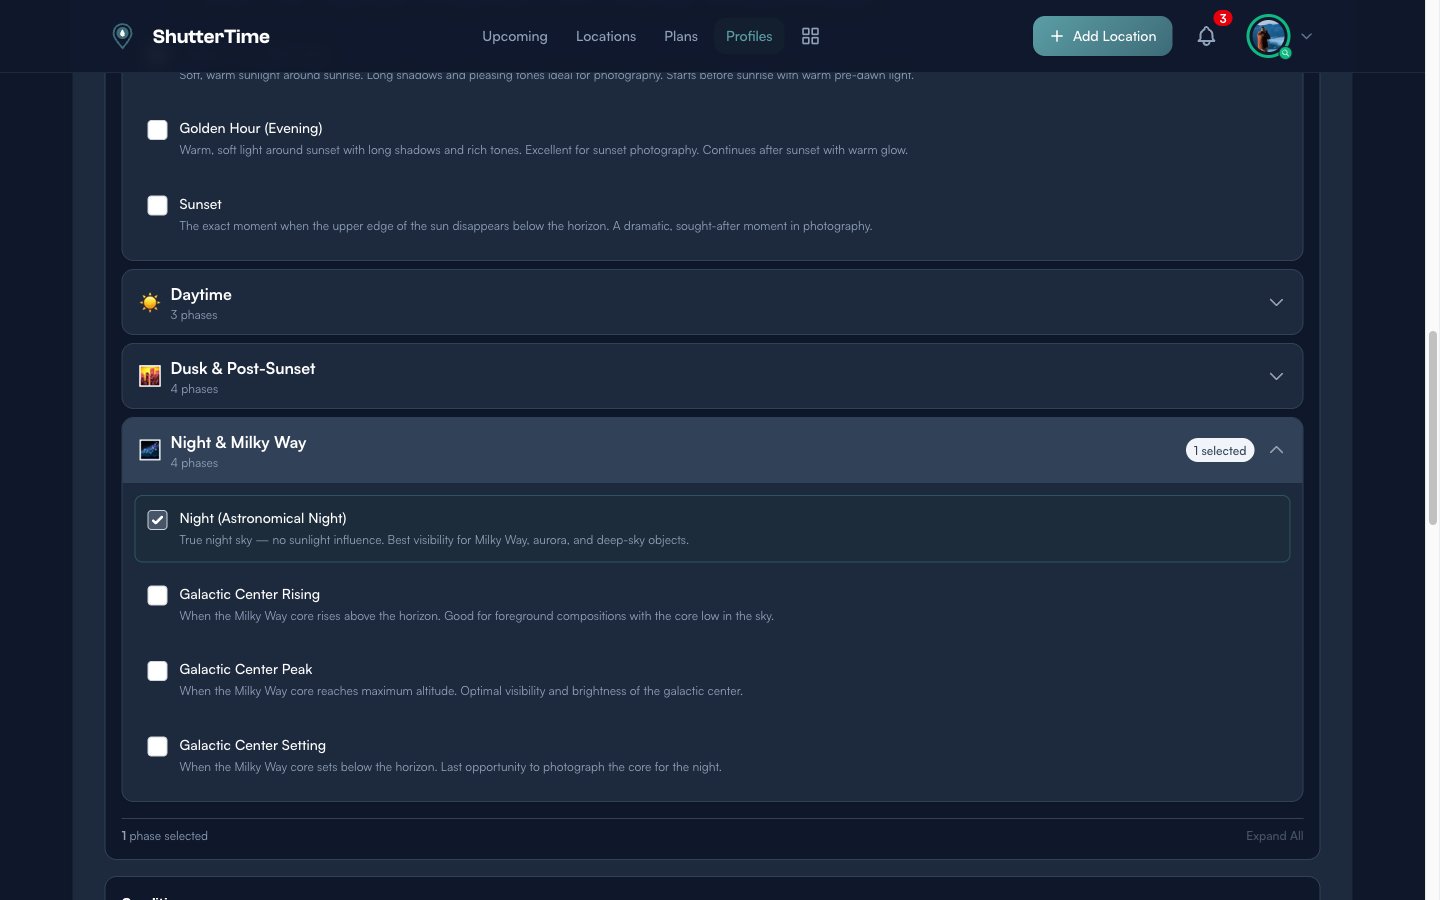
Time Windows & Phases
Aurora photography requires astronomical darkness. In your profile, select the Night phase and check Astronomical Night — this ensures ShutterTime only scores opportunities when the sun is at least 18° below the horizon, giving you the darkest possible sky.
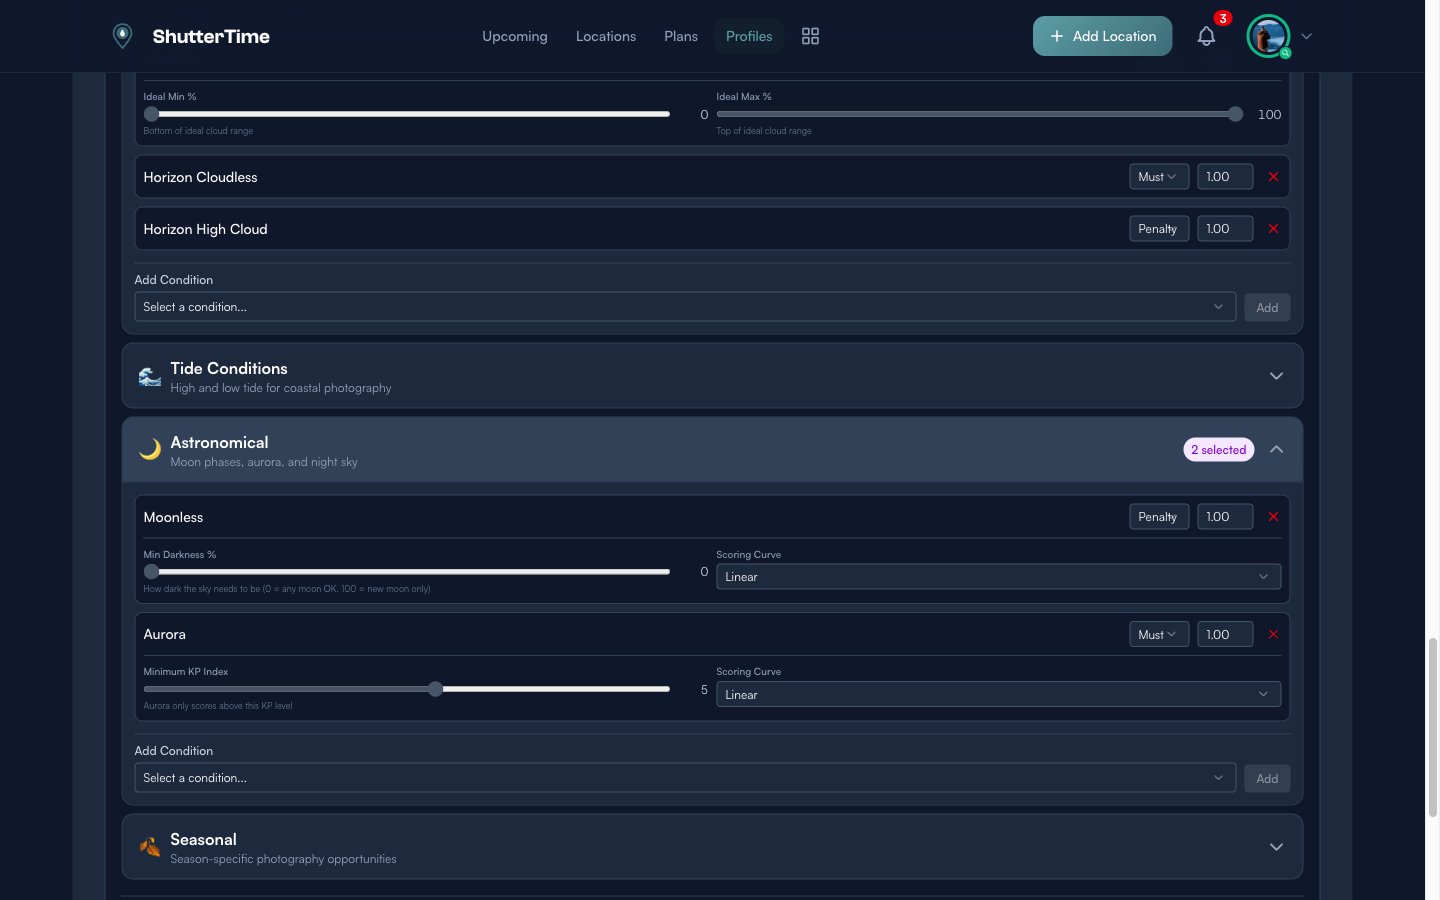
Key Conditions
The two most important conditions for aurora photography are:
- Aurora KP — The geomagnetic activity index. Higher KP means stronger aurora. At southern Australian latitudes, you typically need KP 5+ for visible aurora, though KP 3-4 can sometimes produce faint displays from southern coastal locations.
- Moonless — Moon illumination drowns out the aurora. This condition ensures you're shooting during dark moon phases or when the moon is below the horizon.
Additional conditions like Horizon Cloudless, Clear Cloud, and Wind help ensure clear viewing conditions.
Choosing the Right Location
Aurora is best viewed from locations with a clear view of the southern horizon, minimal light pollution, and ideally an interesting foreground. Coastal locations facing south are excellent choices in Australia.
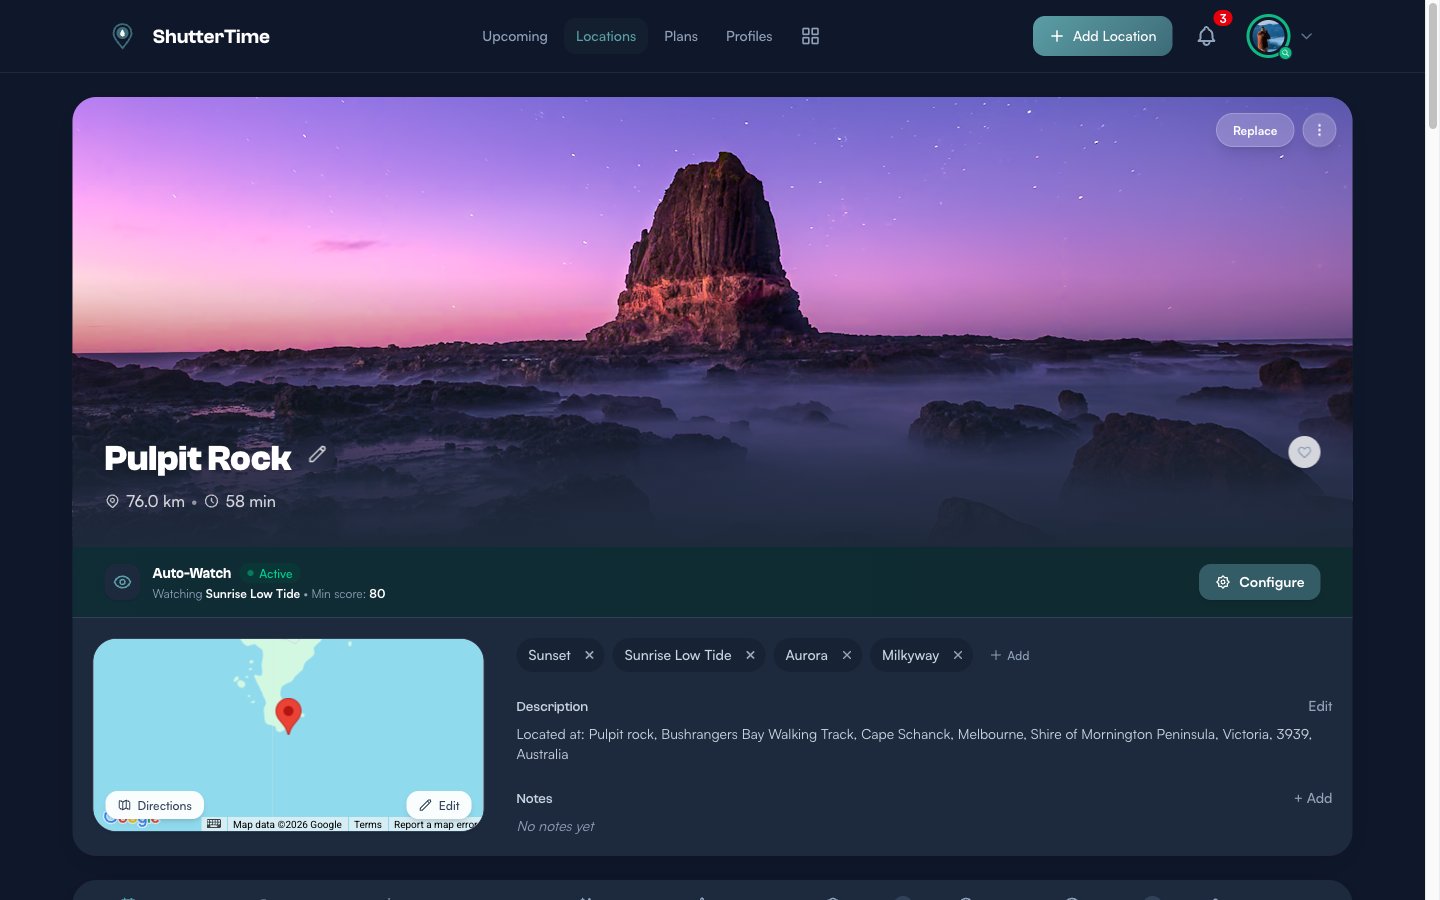
Assign the Aurora Profile
Once you have the profile set up, assign it to your locations. Navigate to a location and add the Aurora profile from the profile tabs. Here's an example with Pulpit Rock on the Mornington Peninsula — a south-facing coastal location perfect for aurora photography:
What Makes a Good Aurora Location
- Clear southern horizon — No hills, buildings, or trees blocking the view to the south
- Low light pollution — Get away from city lights; coastal and rural areas are ideal
- Interesting foreground — Rock formations, jetties, lighthouses, or reflective water add depth to your compositions
- Safe night access — Make sure the location is accessible and safe to visit after dark
- Tide awareness — For coastal spots, check the tide schedule to avoid getting caught by rising water
Checking the Tides
Many of the best aurora locations are coastal, and that means tides matter. Rocky platforms, beaches, and foreshore spots can become dangerous — or completely inaccessible — at high tide, especially at night when visibility is limited.
ShutterTime includes a Tides tab on every coastal location page, pulling real-time data from the Bureau of Meteorology. Here's what the Tides tab looks like for Pulpit Rock:
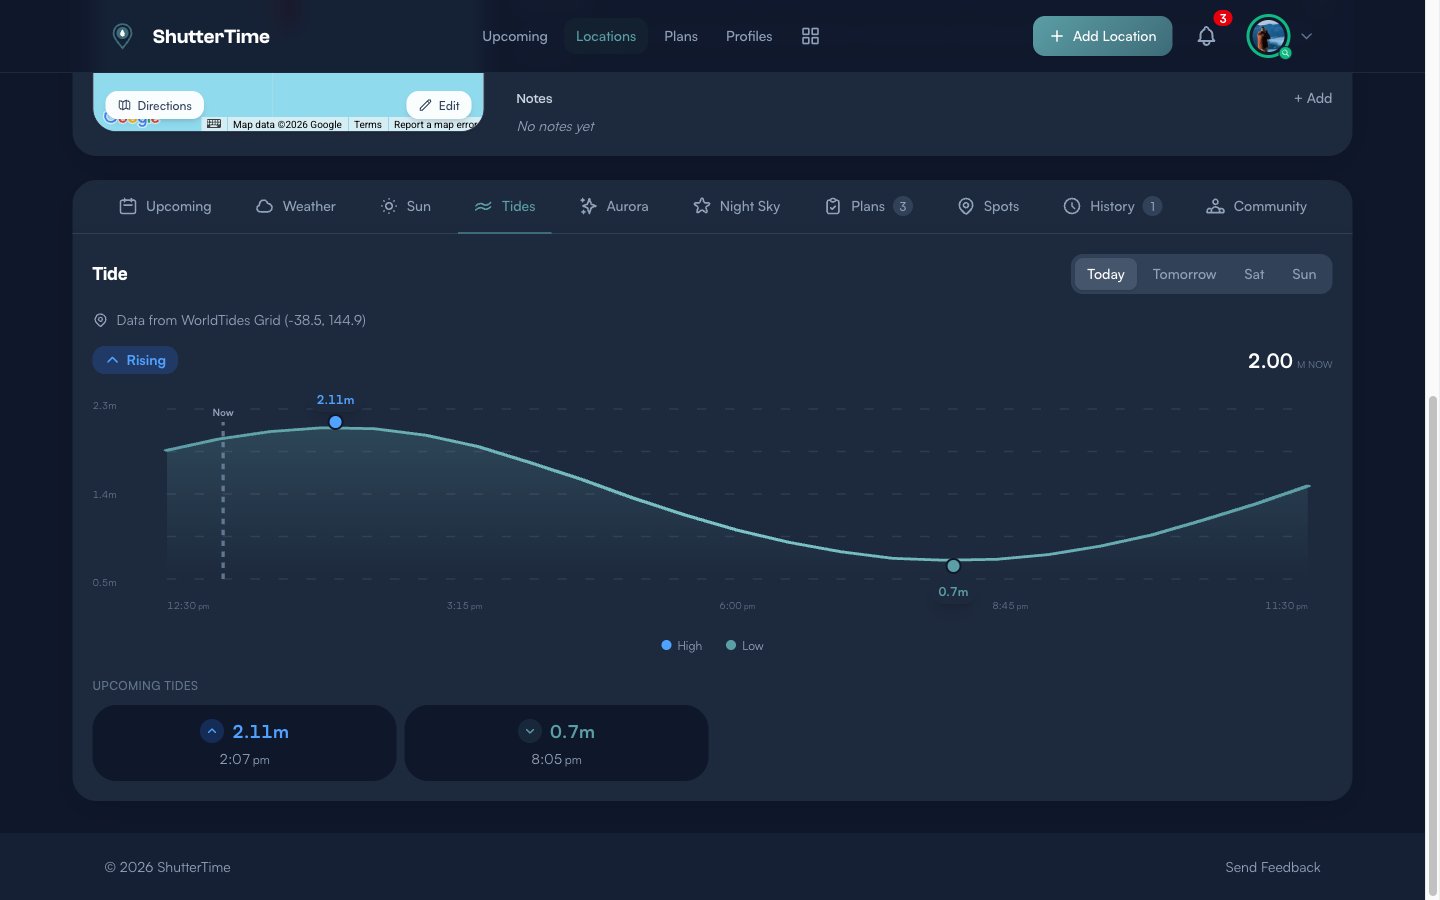
The Tides tab shows you:
- Current tide status — Whether the tide is Rising or Falling, and the current height in metres
- Tide chart — A visual timeline of tide heights throughout the day, so you can see exactly when high and low tides occur
- Upcoming predictions — The next high and low tide times with their predicted heights
- Multi-day view — Switch between days to plan your shoot around the safest tide windows
For aurora photography, you generally want to arrive during a falling or low tide. This gives you the most foreground to work with and keeps you well clear of the waterline during your shoot. Always check the tide predictions for your planned shooting window — a rising tide at 2am can catch you off guard when you're focused on the sky.
Reading the Aurora Tab
Every location in ShutterTime with an Aurora profile has a dedicated Aurora tab. This gives you a multi-day KP forecast at a glance.
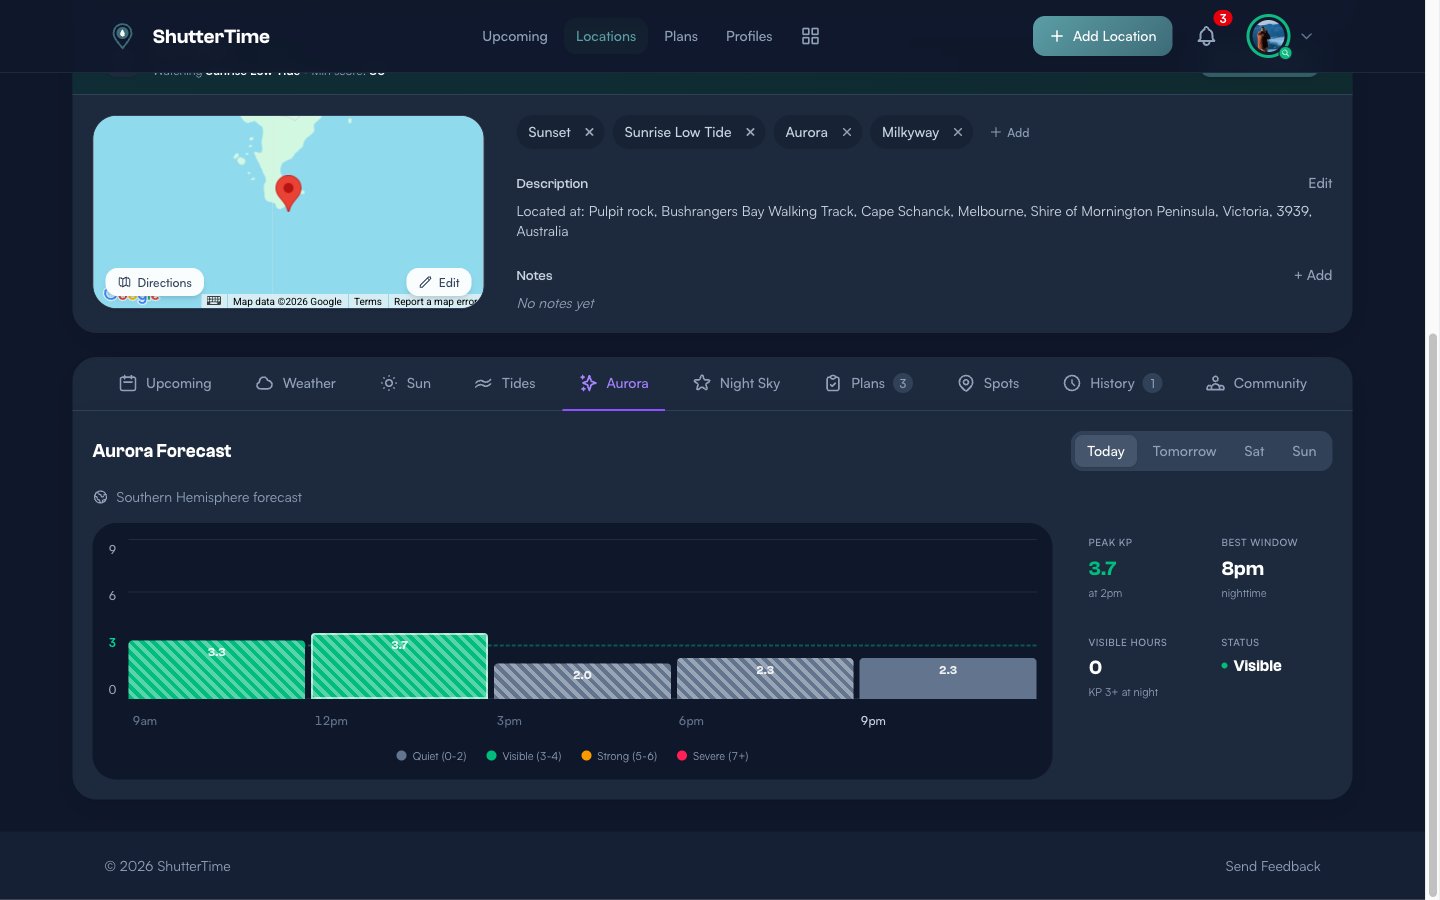
The Aurora tab shows:
- KP Forecast Chart — Hourly KP predictions with color-coded bars: grey for Quiet (0-2), green for Visible (3-4), orange for Strong (5-6), and red for Severe (7+)
- Peak KP — The highest predicted KP value and when it occurs
- Best Window — The optimal nighttime window for viewing
- Visible Hours — How many hours of KP 3+ are expected during darkness
- Status — Current aurora activity level
Use the day buttons (Today, Tomorrow, etc.) to check the forecast for upcoming nights and plan your shoot for the best predicted conditions.
Scoring and Opportunities
When ShutterTime calculates opportunities for your Aurora profile, it combines all your conditions into a single 0-100 score. A high score means:
- Strong KP activity predicted during astronomical night
- Low or no moon illumination
- Clear skies with minimal cloud cover
- Low wind for steady long exposures
The Upcoming tab on any location page shows Aurora opportunities alongside your other profiles, so you can see at a glance which nights look promising:
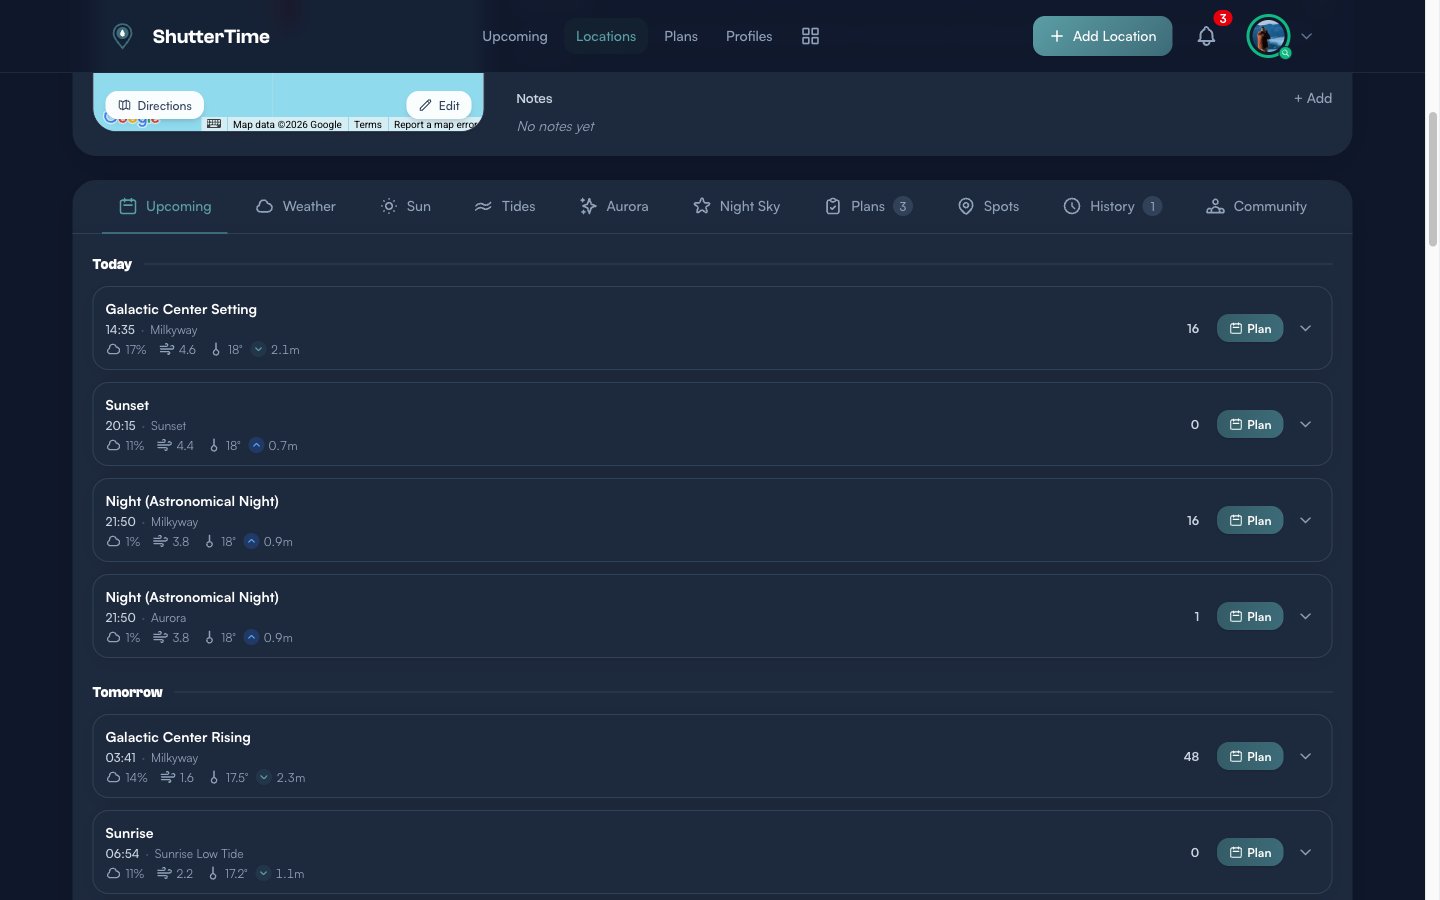
Enable Auto-Watch on your best aurora locations to get notified when conditions look good.
Gear Essentials
Aurora photography requires specific gear for the best results:
- Wide-angle lens (14-24mm) — Aurora displays can span the entire sky. A fast wide-angle lens (f/2.8 or wider) captures more of the display and lets in more light.
- Sturdy tripod — Essential for the long exposures needed in low light. Make sure it's stable in wind.
- Camera with good high-ISO performance — You'll be shooting at ISO 1600-6400. Full-frame sensors handle noise better at these settings.
- Spare batteries — Cold nights drain batteries quickly. Keep spares warm in your pocket.
- Headlamp with red light mode — Preserves your night vision while you work.
- Intervalometer or remote shutter — Eliminates camera shake during long exposures. Many cameras have built-in interval timers.
- Warm clothing — Aurora shoots mean hours outdoors at night. Dress in layers and bring gloves that work with your camera controls.
Camera Settings Starting Point
- Mode: Manual
- Aperture: Wide open (f/2.8 or faster)
- Shutter Speed: 8-15 seconds (shorter for brighter displays to capture curtain detail)
- ISO: 1600-3200 (adjust based on aurora brightness)
- Focus: Manual focus on stars or a distant light, then tape the focus ring
- White Balance: Around 3500K for natural green tones, or shoot RAW and adjust later
When to Go
Aurora activity follows the solar cycle and is most active around solar maximum. The current Solar Cycle 25 peaked in 2024-2025, but activity remains elevated for several years after the peak — so conditions are still excellent heading into 2026 and beyond.
Best seasons for aurora in the Southern Hemisphere:
- March-April and September-October — Equinox periods tend to produce stronger geomagnetic storms due to the orientation of Earth's magnetic field relative to the sun
- Winter months (May-August) — Longer nights mean more hours of darkness, but weather can be less cooperative
Best time of night:
- Astronomical night begins roughly 1.5-2 hours after sunset
- Aurora can appear at any time during the night, but activity often peaks around local midnight
- ShutterTime's Aurora tab shows you the best predicted window for each night
Tips for Success
- Monitor the KP forecast daily — Use ShutterTime's Aurora tab to track predictions several days out and plan ahead
- Set up Auto-Watch — Configure alerts on your best aurora locations so ShutterTime notifies you when conditions align
- Have multiple locations scouted — Weather can vary locally; having backup spots means you can chase clear skies
- Arrive early — Get to your location before astronomical night begins to set up and compose your shots while there's still some ambient light
- Shoot RAW — Aurora colors are subtle and RAW files give you much more flexibility in post-processing
- Take test shots — Start with shorter exposures at higher ISO to check composition and focus, then dial in your final settings
- Be patient — Aurora can be faint and intermittent. Sometimes the best displays happen in short bursts after quiet periods
- Check real-time data — Websites like the Bureau of Meteorology's space weather page can confirm if a predicted storm has actually arrived
Final Thoughts
Aurora photography is one of the most rewarding — and unpredictable — types of photography you can pursue. Some nights you'll drive for hours only to find overcast skies; other nights the sky will erupt with color when you least expect it. That's part of the magic.
The good news is that ShutterTime takes much of the guesswork out of the equation. Instead of refreshing space weather websites and hoping for the best, you get a clear signal: a scored opportunity that factors in KP activity, cloud cover, moonlight, and darkness all at once. When your Aurora profile lights up with a high score, that's your cue to grab your gear and go. No more wasted drives on nights where the conditions just aren't there.
Stay safe out there. Coastal locations at night can be treacherous — always check tide times before heading out, tell someone where you're going, wear appropriate footwear, and bring a fully charged phone. The best photo isn't worth a risky situation.
Clear skies and strong KP to you!