Mastering Photography Profiles: Conditions, Phases & Scoring
Profiles Intermediate
What Are Photography Profiles?Profiles are the heart of ShutterTime's scoring system. A profile defines when and under what conditions you want to pho...
9 min read
Published February 15, 2026
What Are Photography Profiles?
Profiles are the heart of ShutterTime's scoring system. A profile defines when and under what conditions you want to photograph. Think of them as reusable presets for your photography style — a Sunrise profile, a Milky Way profile, an Aurora profile — each with different time windows and environmental requirements.
When you attach profiles to a location, ShutterTime continuously evaluates real-time weather, astronomical, and tidal data against your profile's conditions. The result is a 0–100 score for each upcoming opportunity, so you always know exactly when conditions align for the shot you want.
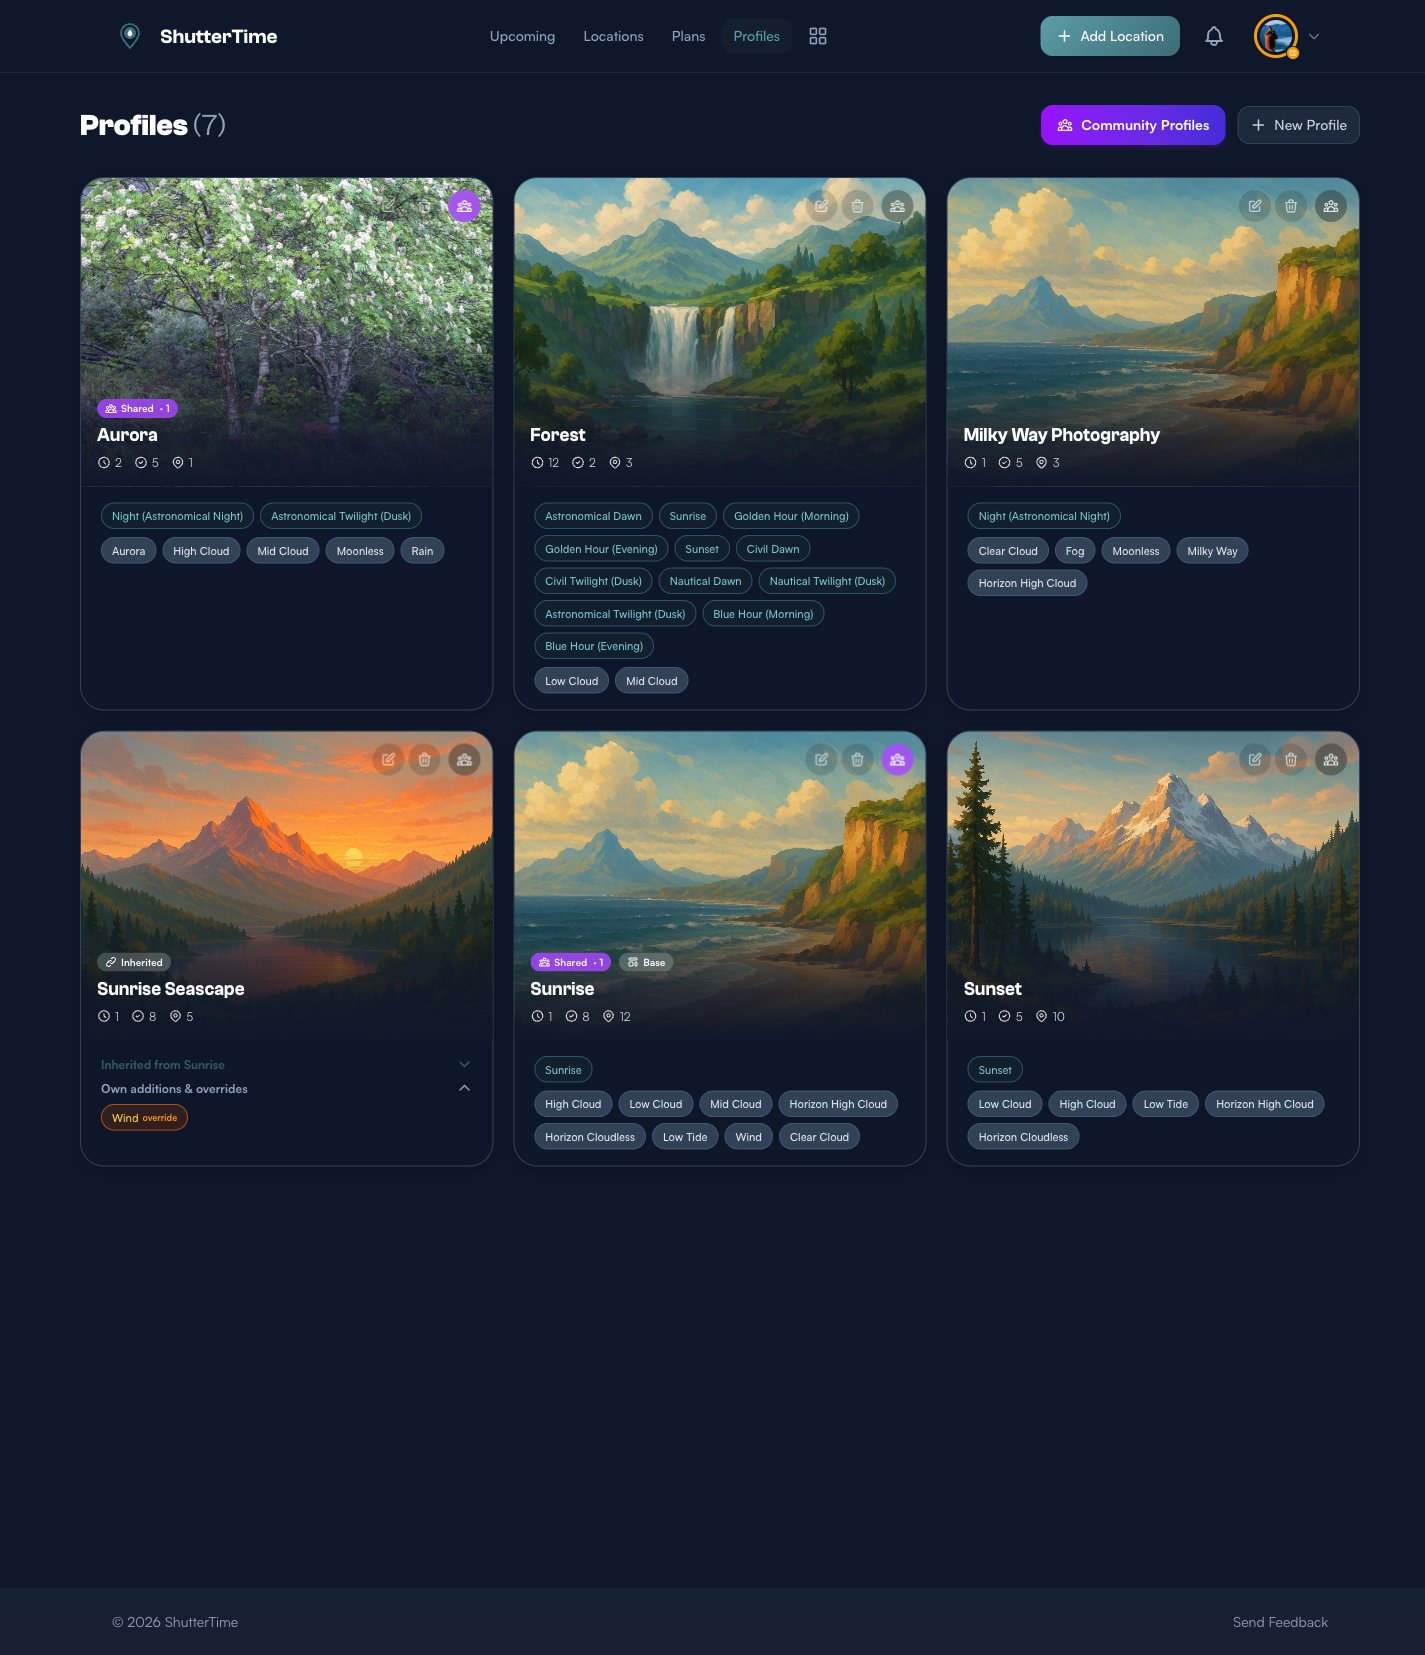
Your profiles page shows all your profiles at a glance. Each card displays the profile's hero image, how many phases (time windows) and conditions it uses, and how many locations it's attached to.
Creating Your First Profile
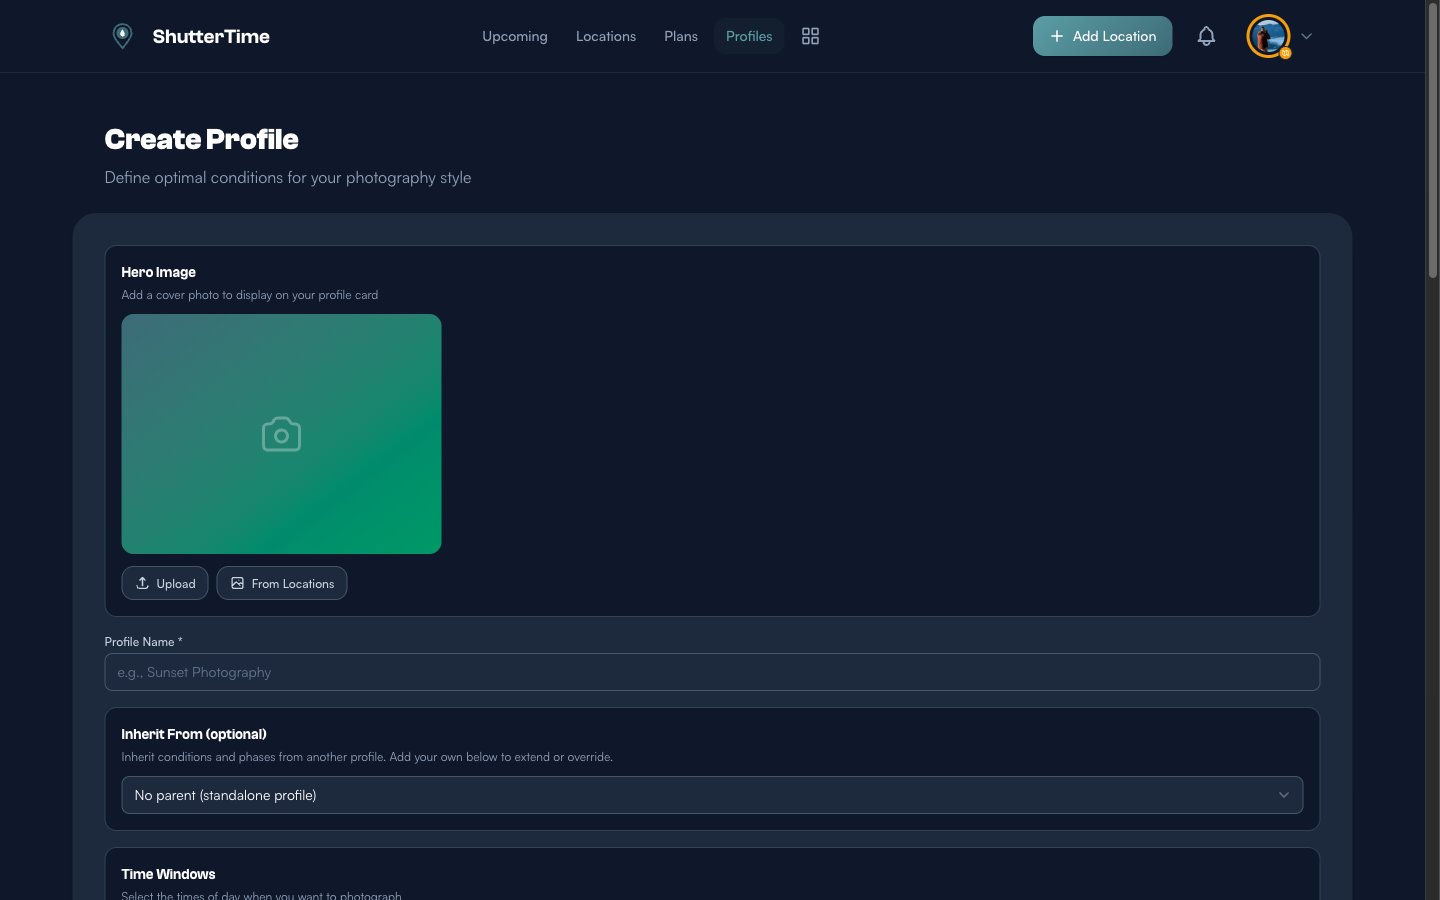
To create a new profile, click + New Profile from the profiles page. You'll see a form with three main sections:
- Hero Image — A cover photo for your profile card. You can upload one or pick from your existing location photos.
- Profile Name — Give it a descriptive name like "Sunset Seascape" or "Night Sky".
- Inherit From — Optionally base your profile on an existing one (more on this later).
Understanding Phases (Time Windows)
Phases define when during the day your profile is active. ShutterTime divides each day into 19 distinct phases based on the sun's position relative to the horizon. These are grouped into five categories:
Dawn & Pre-Sunrise (4 phases)
- Astronomical Dawn — The first faint light appears as the sun moves from 18° to 12° below the horizon. The darkest stars start to fade.
- Nautical Dawn — The horizon becomes faintly visible with deep blue tones.
- Civil Dawn — Enough light for outdoor activities. The sun is just below the horizon.
- Blue Hour (Morning) — Deep blue sky during nautical twilight. Perfect for moody, atmospheric shots with cool tones.
Golden Hours & Sun (4 phases)
- Sunrise — The exact moment the sun's upper edge appears above the horizon.
- Golden Hour (Morning) — Soft, warm sunlight with long shadows. The classic photography light.
- Golden Hour (Evening) — Same warm quality as morning golden hour, but in the evening.
- Sunset — The dramatic moment the sun disappears below the horizon.
Daytime (3 phases)
- Morning (After Golden Hour) — Brighter, clearer mid-morning light.
- Midday — Harsh overhead sun. Challenging for most photography.
- Afternoon (Before Golden Hour) — Moderate light as the sun begins to descend.
Dusk & Post-Sunset (4 phases)
- Civil Twilight (Dusk) — Bright sky with only a few stars visible. Great for cityscapes.
- Blue Hour (Evening) — Rich blue tones after sunset. Dramatic and moody.
- Nautical Twilight (Dusk) — The sky deepens to blue and purple.
- Astronomical Twilight (Dusk) — Faintest residual sunlight. Excellent for astrophotography transitions.
Night & Milky Way (4 phases)
- Night (Astronomical Night) — True dark sky with no sunlight influence. Best for Milky Way and deep-sky objects.
- Galactic Center Rising — When the Milky Way core rises above the horizon.
- Galactic Center Peak — Maximum altitude of the galactic center. Optimal visibility.
- Galactic Center Setting — Last opportunity to photograph the Milky Way core.
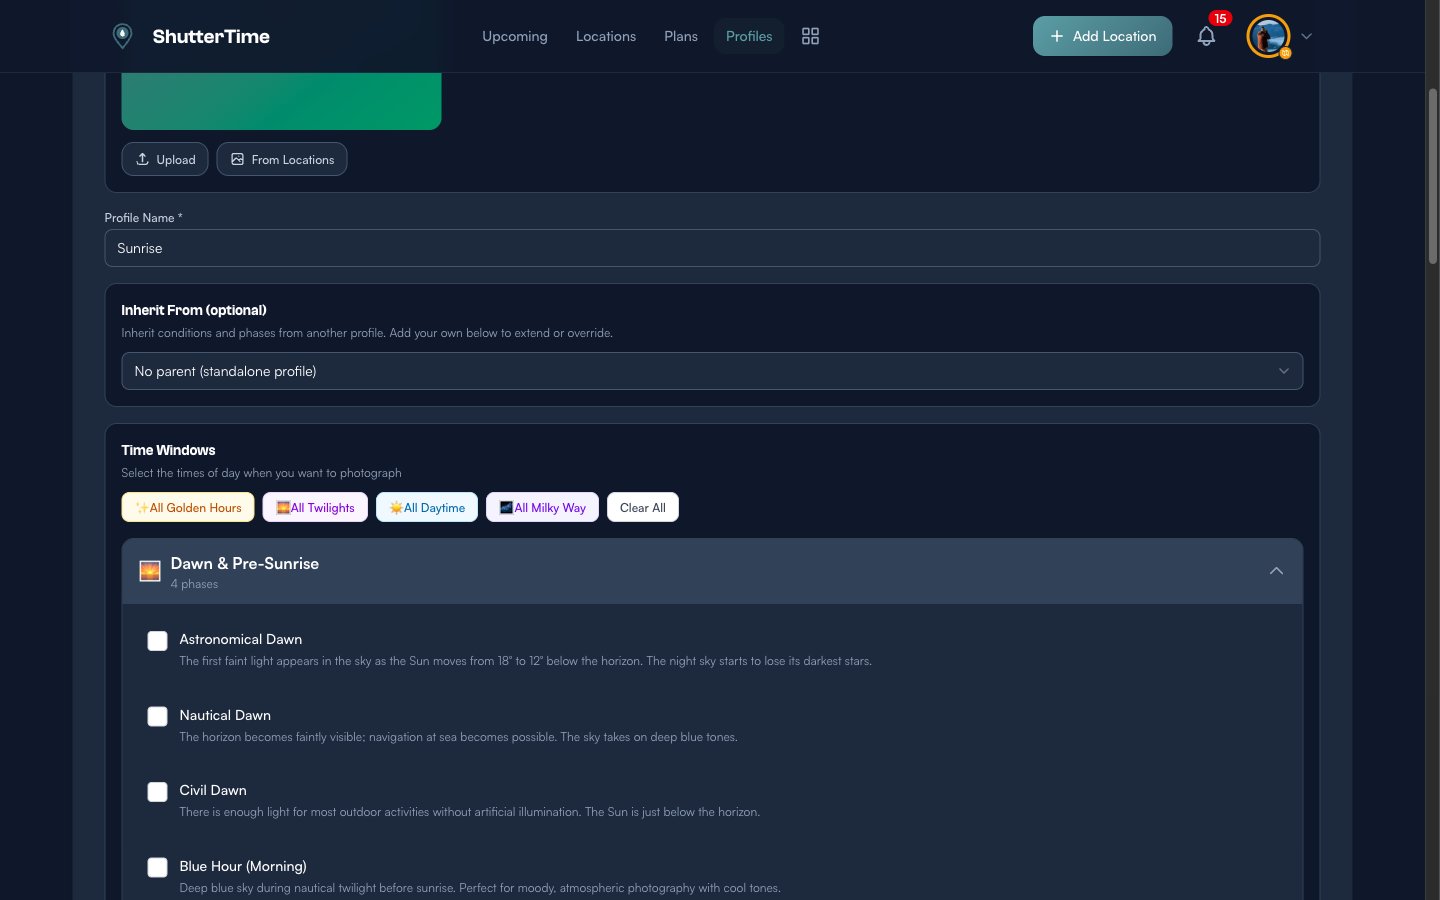
Use the quick-select buttons at the top — All Golden Hours, All Twilights, All Daytime, or All Milky Way — to quickly toggle common phase combinations. Each phase includes a description to help you understand exactly what light conditions to expect.
Adding Conditions
Conditions define the environmental requirements for your shots. They are organized into four categories:
- Weather Conditions — Cloud cover, rain, snow, fog, wind, and more
- Tide Conditions — High and low tide for coastal photography
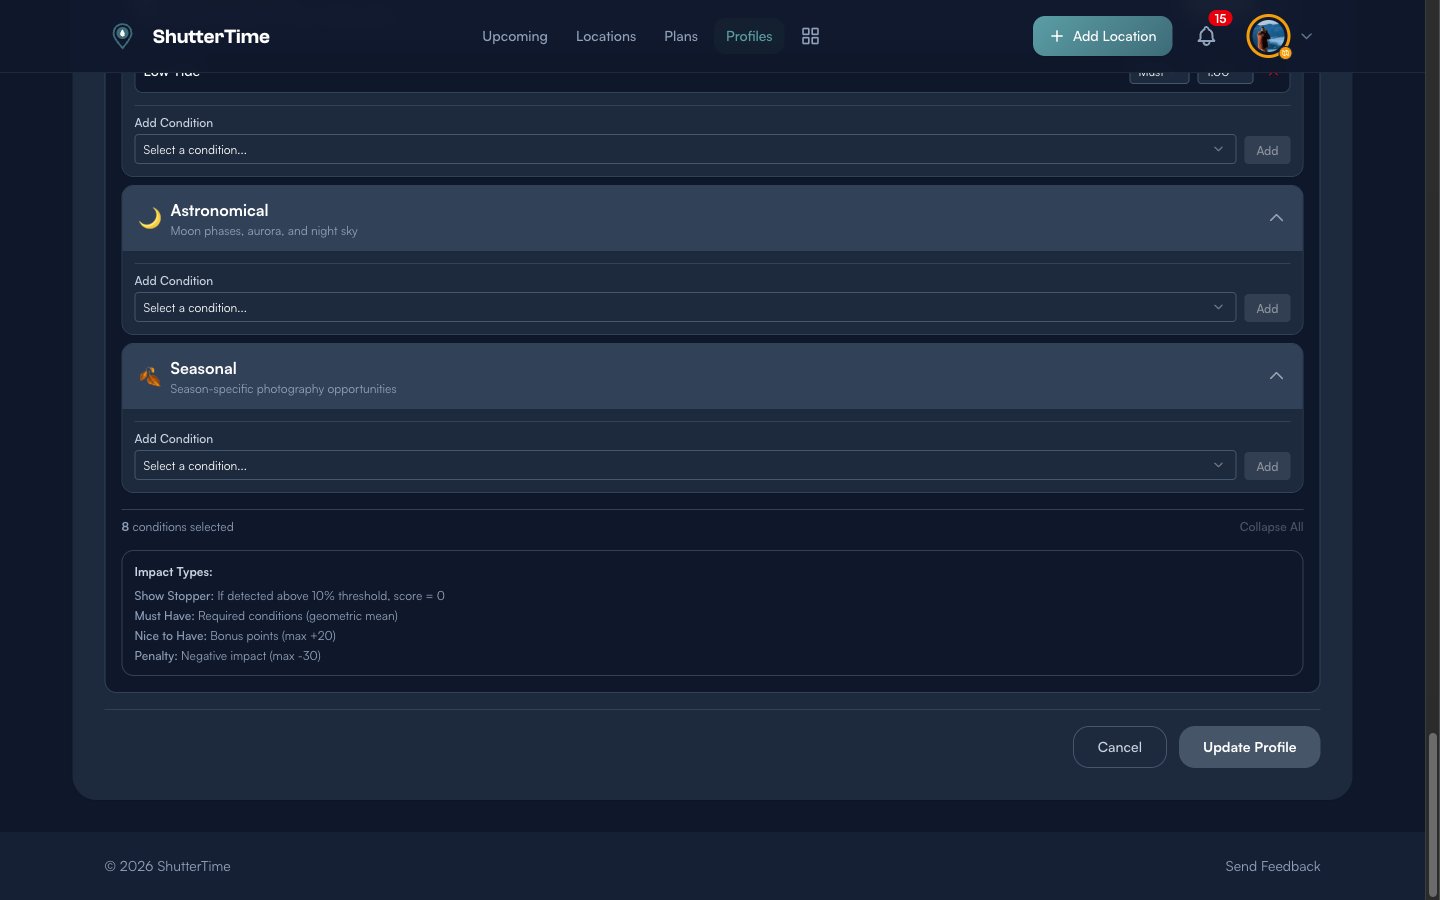
- Astronomical — Moon phases, aurora, and Milky Way visibility
- Seasonal — Season-specific opportunities
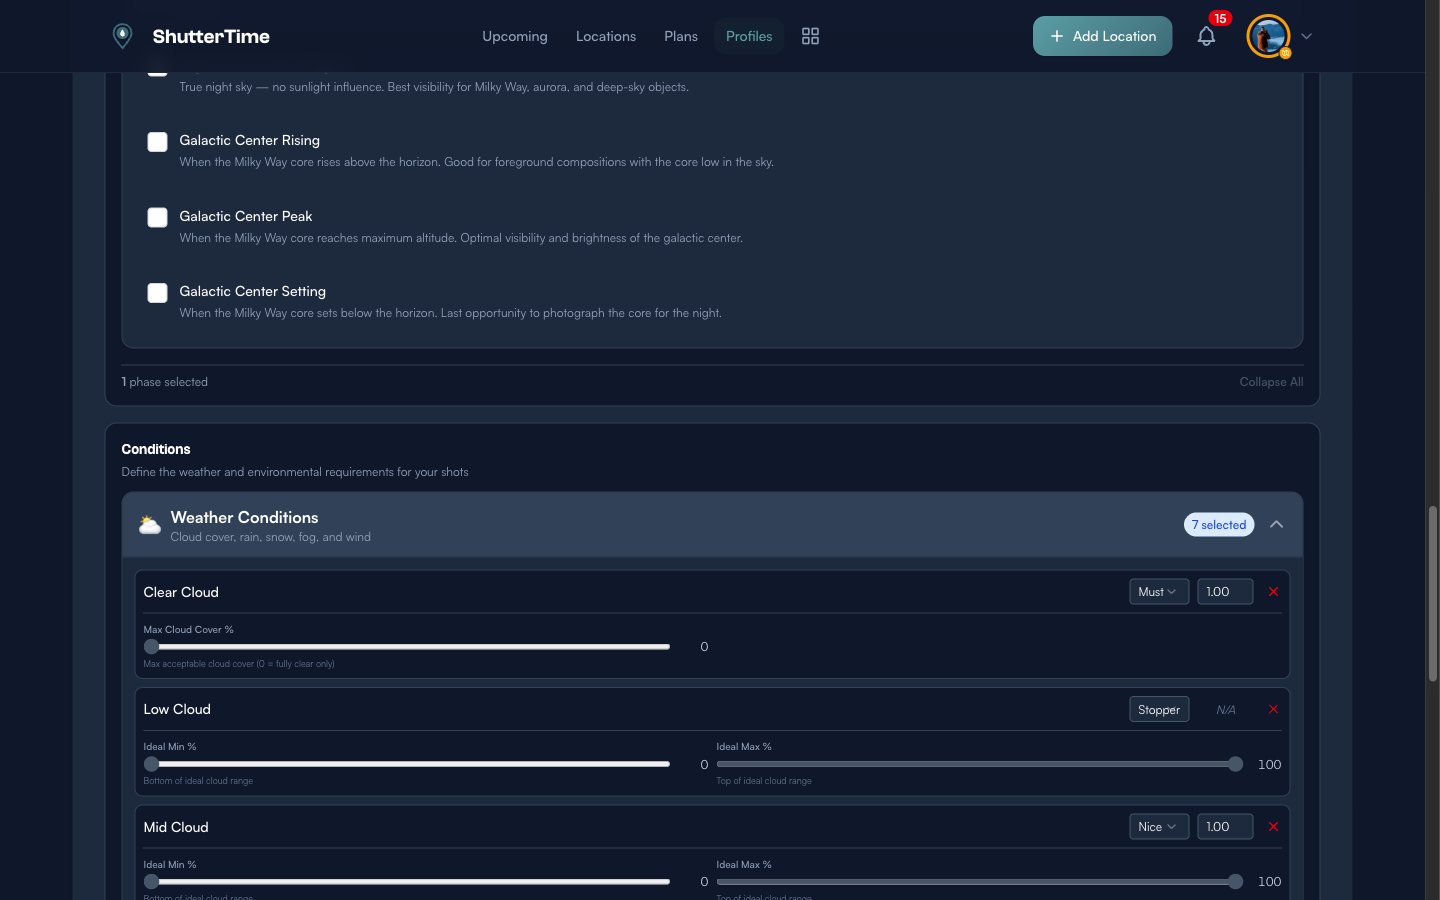
Condition Impact Types: How They Affect Your Score
Every condition you add must be assigned one of four impact types. This is the most important concept to understand — it determines how each condition influences the final score.
Show Stopper
If a show-stopper condition is triggered, the entire score drops to zero. There is a small built-in tolerance so minor readings do not cause false alarms. Use this for conditions that would completely ruin your shot. For example, setting Low Cloud as a show-stopper on a sunrise profile means any significant low cloud cover kills the opportunity entirely.
Must Have
Required conditions that form the baseline score. All must-have conditions are combined using a smart algorithm that ensures every one of them needs to score well — a single poor must-have drags the entire score down significantly, even if other conditions are perfect. Use this for conditions that are essential to your shot, like Clear Cloud for astrophotography or High Cloud for colourful sunrises.
Nice to Have
Bonus conditions that add extra points on top of the baseline. These reward extra-good conditions without penalizing when they're absent. Great for things like Horizon Cloudless (a clean horizon line is a bonus for sunrise shots, not a requirement).
Penalty
Conditions that deduct points from the score. Use this for things you want to avoid. Wind is a classic penalty condition — strong wind doesn't ruin the shot entirely, but it makes things harder (tripod shake, lens spray, etc.).
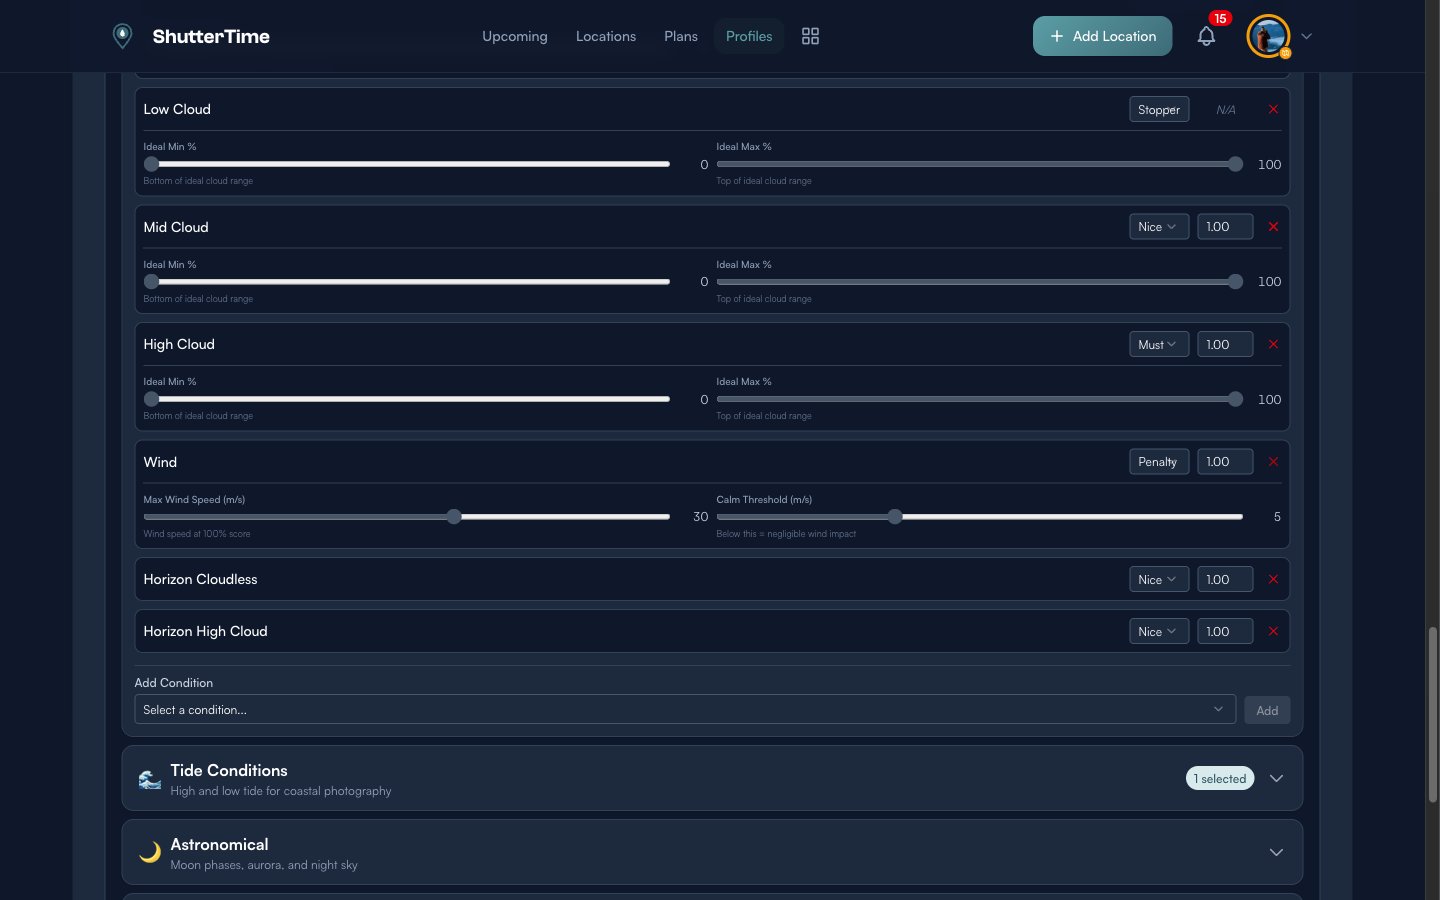
Weather Conditions — Deep Dive
The weather category has the most conditions and the most configurable settings.
Cloud Conditions
There are seven cloud-related conditions, each targeting different aspects of cloud cover:
- Clear Cloud — Overall cloud cover. Has a Max Cloud Cover % slider. Set to 0 for "clear skies only" mode, or increase the threshold for partial cloud acceptance.
- Low Cloud — Low-level clouds (0–2km altitude). Configurable with Ideal Min % and Ideal Max % sliders to define your preferred cloud range.
- Mid Cloud — Mid-level clouds (2–6km). Same min/max sliders. Mid-level clouds often create the most dramatic sunrise and sunset colours.
- High Cloud — High-level clouds (6–12km). Thin cirrus clouds that catch light beautifully during golden hour.
The Horizon variants focus specifically on clouds near the horizon line:
- Horizon Cloudless — Whether the horizon is clear of clouds. Important for unobstructed sunrise/sunset views.
- Horizon Low Cloud — Low clouds specifically at the horizon.
- Horizon Mid Cloud — Mid-level clouds at the horizon.
- Horizon High Cloud — High clouds at the horizon — often the ones that create spectacular colour.
Wind
Wind has two configurable parameters:
- Max Wind Speed (m/s) — The wind speed at which the penalty reaches its maximum. Adjust this based on your tolerance for wind.
- Calm Threshold (m/s) — Below this value, wind has negligible impact. Lower this if you need very still conditions (e.g. mirror-like reflections).
Wind is typically set as a Penalty condition since strong wind makes photography harder but doesn't make it impossible.
Other Weather Conditions
- Rain — Current rainfall. Typically a show-stopper or penalty.
- Snow — Current snowfall. Can be a must-have for winter landscape profiles.
- Fog — Fog and visibility conditions. Could be a must-have for moody fog photography or a show-stopper for clear views.
- Rainbow — Evaluates conditions likely to produce rainbows (requires recent rain plus partial cloud cover).
- Recent Rain — Whether it has rained recently. Useful for waterfall photography (higher flow) or reflections on wet surfaces.
- Snow In Past Days — Checks for accumulated snow over a configurable period. Has settings for minimum snow days, depth, and lookback period.
Tide Conditions
Essential for coastal photography. Two options:
- Low Tide — Scores highest when the tide is at its lowest. Great for exposing rock pools, foreground textures, and walking out to features normally underwater.
- High Tide — Scores highest at peak tide. Useful for dramatic wave action, water reaching up to sea walls, or reflections across flooded features.
Tide data is sourced from nearby tide stations (within 25km) and is only evaluated for locations near the coast. Inland locations will show a neutral tide score.
Astronomical Conditions
For night-sky photographers:
- Moonless — Low moon illumination. Essential for astrophotography since moonlight washes out faint stars and the Milky Way.
- Aurora — Northern/Southern Lights conditions based on the KP geomagnetic index. Higher KP values mean stronger aurora activity.
- Milky Way — Evaluates Milky Way visibility based on galactic center position, moon phase, and sky darkness.
Seasonal Conditions
Season-specific requirements for your profiles:
- Winter, Spring, Summer, Autumn — Each scores highest during its respective season and transitions gradually at season boundaries.
Use seasonal conditions to create profiles that only activate during certain times of year — like a "Snow-Capped Mountains" profile that requires winter, or a "Wildflower Fields" profile for spring.
How Scoring Works
When ShutterTime evaluates an opportunity, it follows this process:
- Check phases — Only profiles whose selected phases match the current time of day are evaluated.
- Gather conditions — All conditions from matching profiles are collected.
- Check show-stoppers first — If any show-stopper condition is triggered, the score drops to zero immediately.
- Score must-haves — The remaining must-have conditions are combined to produce a base score. Every must-have matters — one poor condition pulls the whole score down.
- Add bonuses — Nice-to-have conditions contribute bonus points on top of the base.
- Apply penalties — Penalty conditions apply deductions based on how unfavourable they are.
- Final score — The result is clamped to a 0–100 scale, giving you a single number that represents overall shooting conditions.
The colour of the score badge tells you the quality at a glance:
- 90+ — Exceptional conditions (green)
- 80–89 — Great conditions (teal)
- 70–79 — Good conditions (amber)
- <70 — Below threshold (grey)
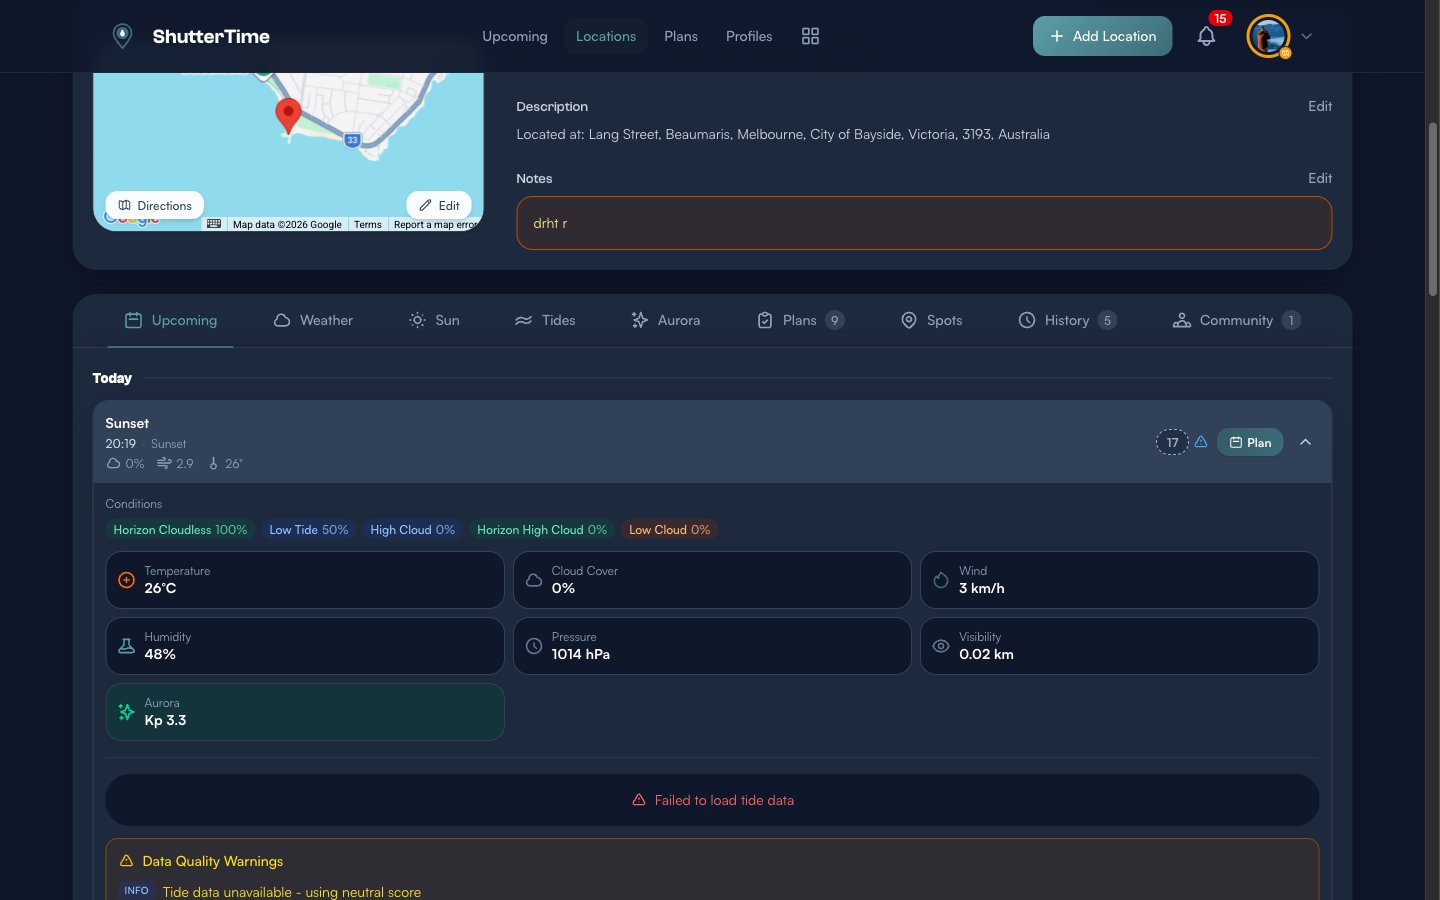
Expanding an opportunity shows the score breakdown — each condition's individual percentage plus detailed weather, tide, and aurora data. This helps you understand exactly why a score is high or low.
Condition Weights
Each condition has a weight value (default 1.00) that amplifies or reduces its influence within its impact type. For example:
Higher weights give a condition more influence over the final score. Use higher weights for the conditions that matter most to your style of photography — for example, weighting clear skies heavily in a sunset profile, or giving tide conditions more importance for a seascape profile. Experiment with different weights and compare the resulting scores against your real-world experience.
Profile Inheritance
One of ShutterTime's most powerful features is profile inheritance. You can create a child profile that inherits all phases and conditions from a parent, then add your own overrides.
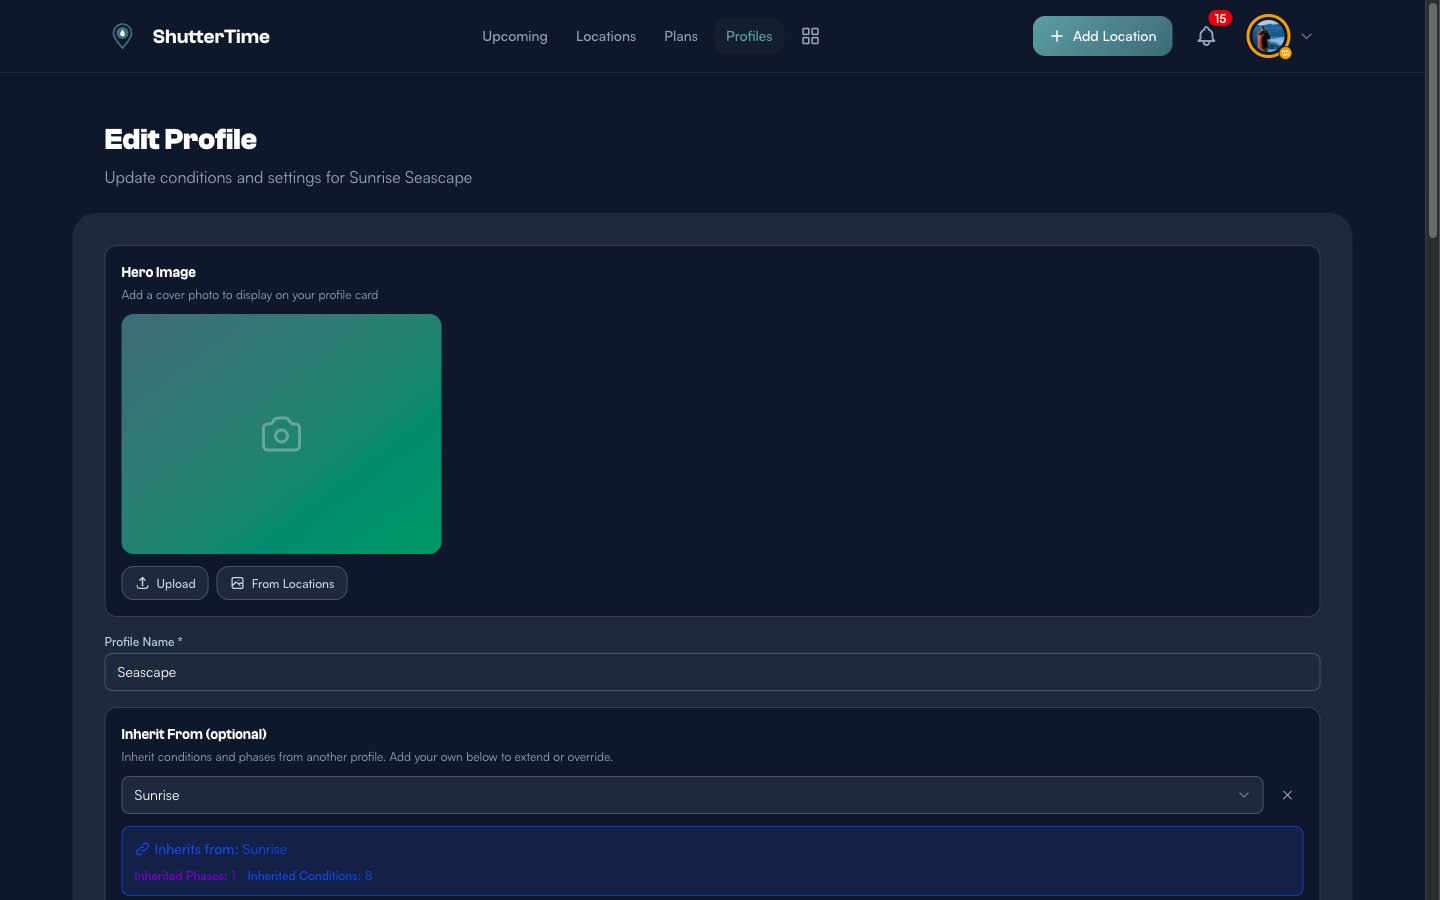
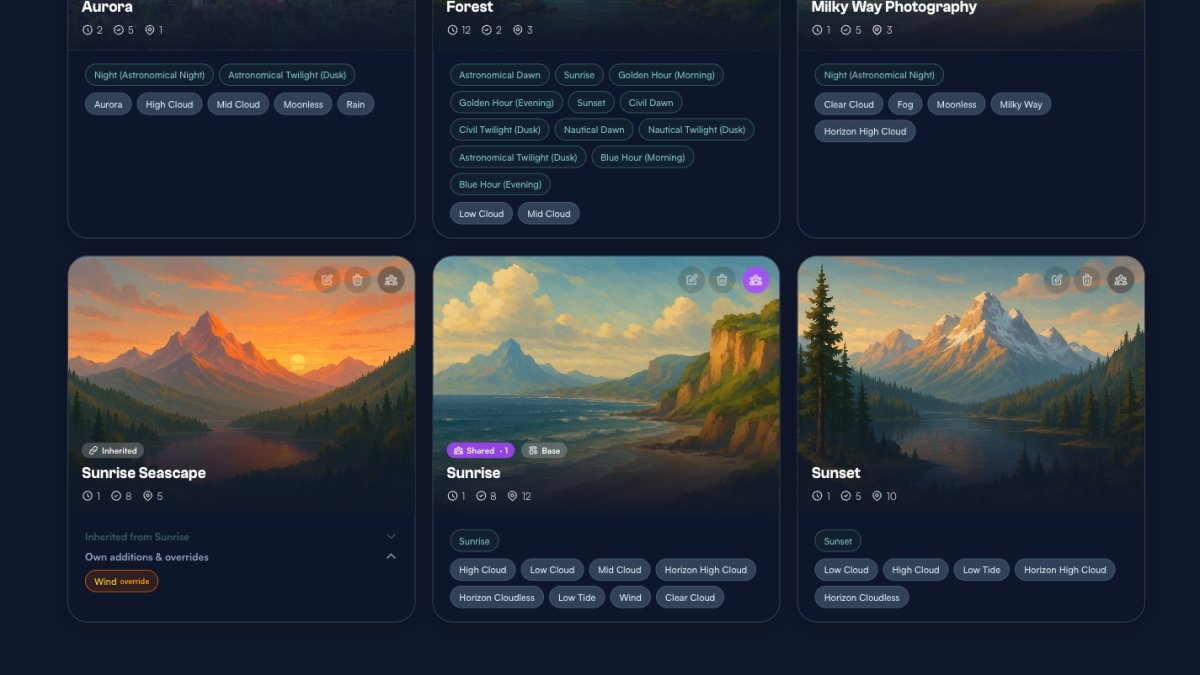
In this example, the Sunrise Seascape profile inherits from Sunrise. The inheritance info box shows it gets 1 phase and 8 conditions from its parent.
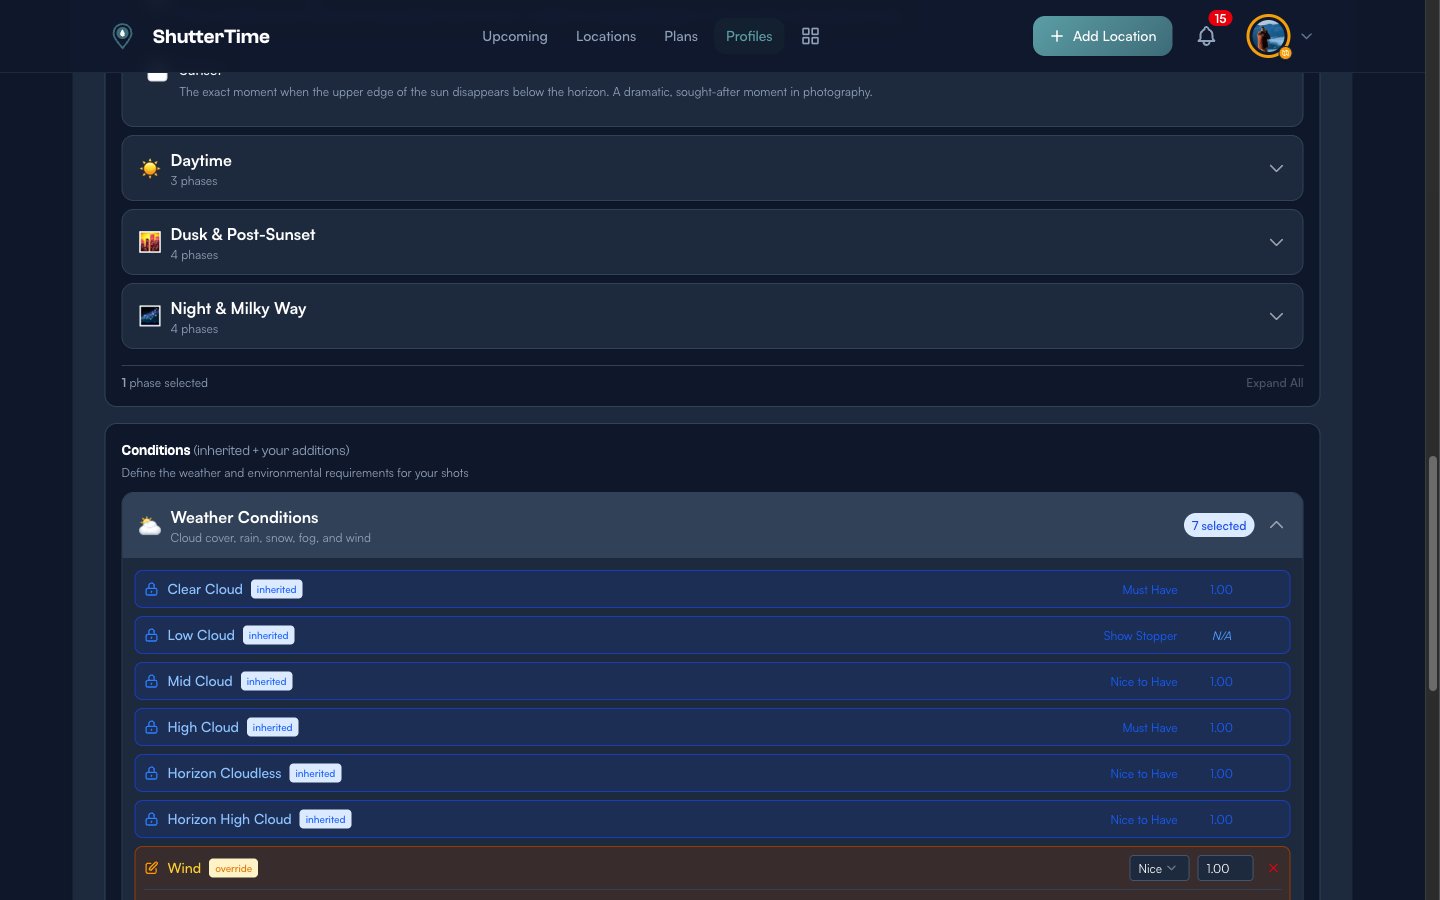
Inherited conditions appear with a lock icon and an inherited badge — you can't modify them directly. But you can override specific conditions. In the screenshot above, the Wind condition has been overridden from the parent's "Penalty" to "Nice to Have", because for seascape photography, some wind can actually create interesting wave action.
You can also add entirely new conditions that don't exist on the parent profile. This makes inheritance perfect for creating specialised variants:
- Sunrise (base profile) → Sunrise Seascape (adds tide conditions, overrides wind)
- Sunset (base profile) → Sunset Storm (adds rain as nice-to-have for dramatic skies)
Your Starter Profiles
Every new ShutterTime account comes with a set of pre-built photography profiles covering popular styles like Sunrise, Sunset, Milky Way, and Aurora. These profiles use well-tested condition combinations that work for most photographers and are a great starting point.
However, the best scores come from profiles tailored to your preferences. We encourage you to customise the default profiles to match your shooting style — adjust the conditions, change the impact types, tweak the weights. You can also duplicate a profile and create variations, like a "Sunset — Calm Water" version alongside a standard "Sunset" profile.
Where to Create Profiles
You can create and manage profiles from the Profiles page in the main navigation. Click + New Profile to start from scratch, or duplicate an existing profile to use as a base.
You can also create a profile directly from a location page — this is useful when you want a profile designed specifically for one spot. Per-location profiles let you fine-tune conditions for the unique characteristics of a particular place, like a coastal location that needs tide and wind conditions versus an inland forest that only cares about cloud cover and fog.
Best Practices
- Add more conditions — The more conditions your profile has, the more data the algorithm has to work with. A profile with five or more conditions produces much more nuanced and accurate scores than one with just one or two.
- Refine over time — After a few shoots, compare your scores to reality. If a score of 85 felt more like a 60, adjust your condition weights or add conditions you hadn't considered — like humidity for coastal fog or horizon cloud cover for sunsets.
- Start with the defaults — Your pre-built profiles are a solid foundation. Modify them to match your preferences rather than building from scratch.
- Use inheritance — Create a base profile (e.g. Sunset) and then child profiles for variations (e.g. Sunset Seascape, Sunset Storm). Changes to the parent automatically flow to children.
What's Next?
Now that you understand profiles, conditions, and scoring, here are some next steps:
- Add locations and attach your profiles to start seeing opportunity scores.
- Create a plan when you spot a high-scoring opportunity — ShutterTime will send you reminders.
- Browse community profiles to discover photography styles shared by other photographers.
- Experiment with condition weights to fine-tune which conditions matter most for your style.